
ClickPesa (TZ) Setup
Connect your ClickPesa merchant account to accept Airtel Money, Tigo Pesa, HaloPesa, and M-Pesa payments (mainly supported in Tanzania) from subscribers.
Log in to ClickPesa Merchant Portal
Go to merchant.clickpesa.com and sign in. Navigate to Settings in the left sidebar.
Go to the Developers Tab
Inside Settings, click Developers. This is where you manage API applications and credentials.
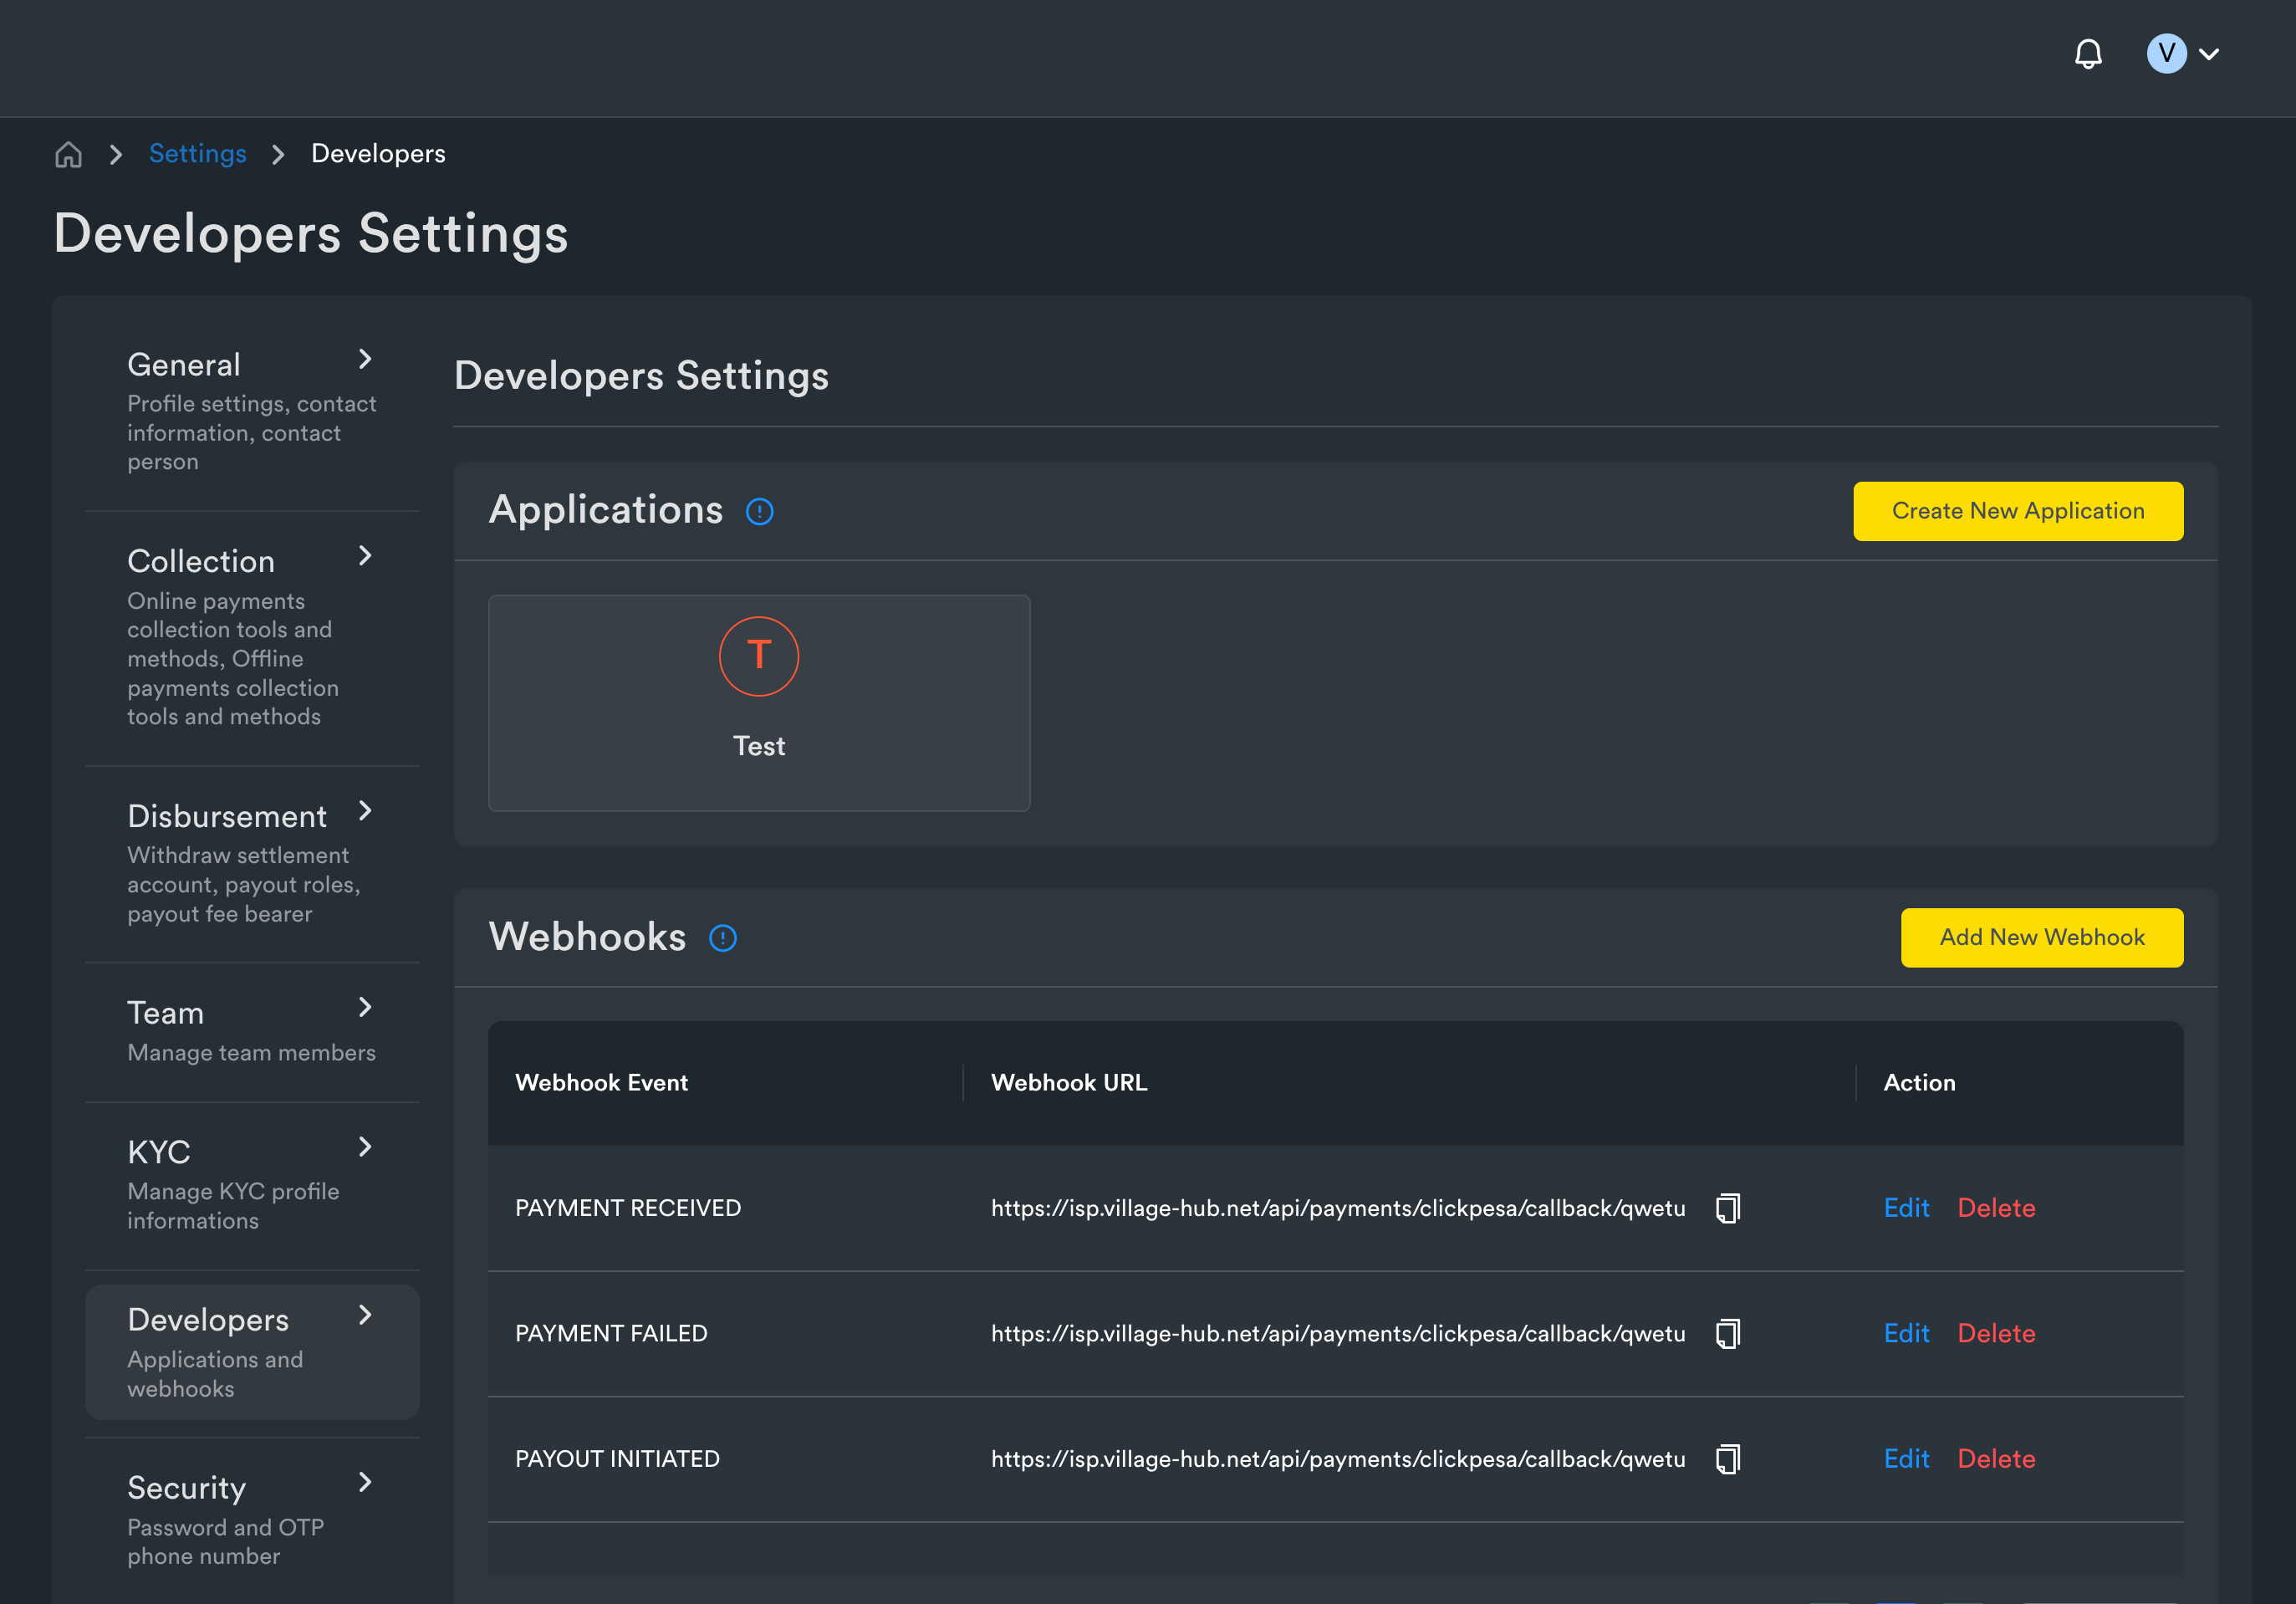
Create a New Application
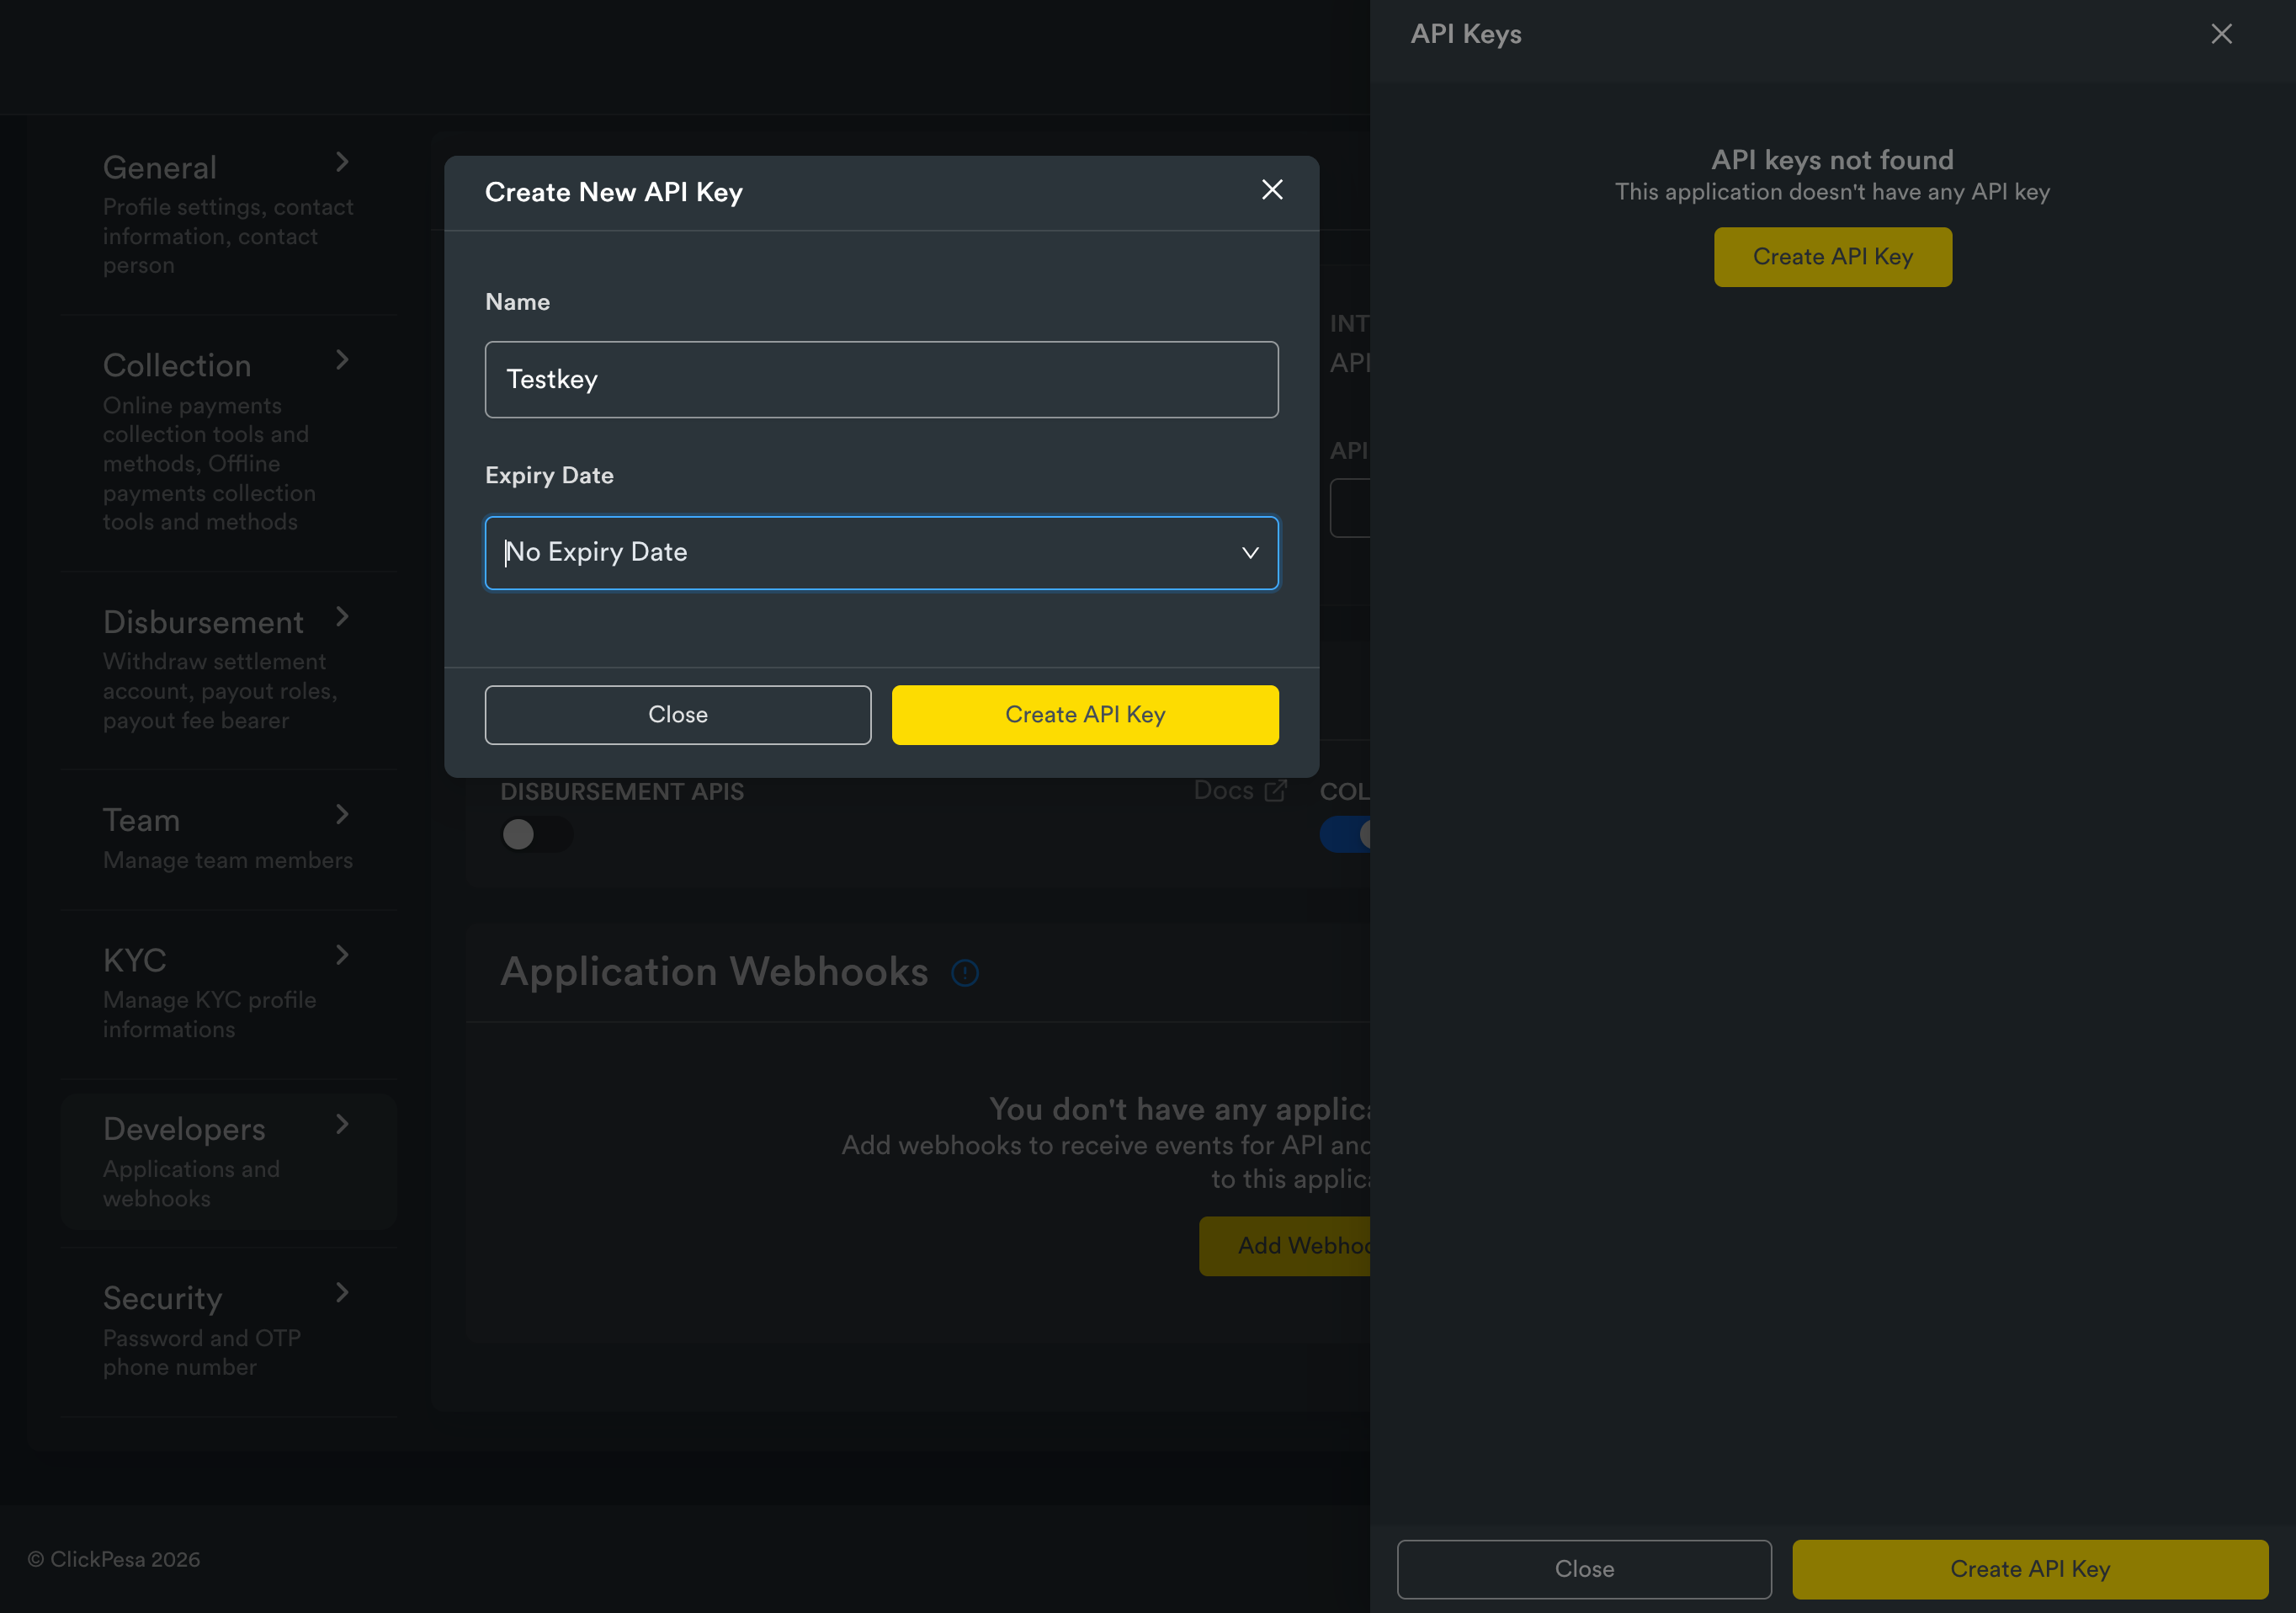
Click Create App. Name it Test App. Choose API to give VillageHub programmatic access to initiate payments.
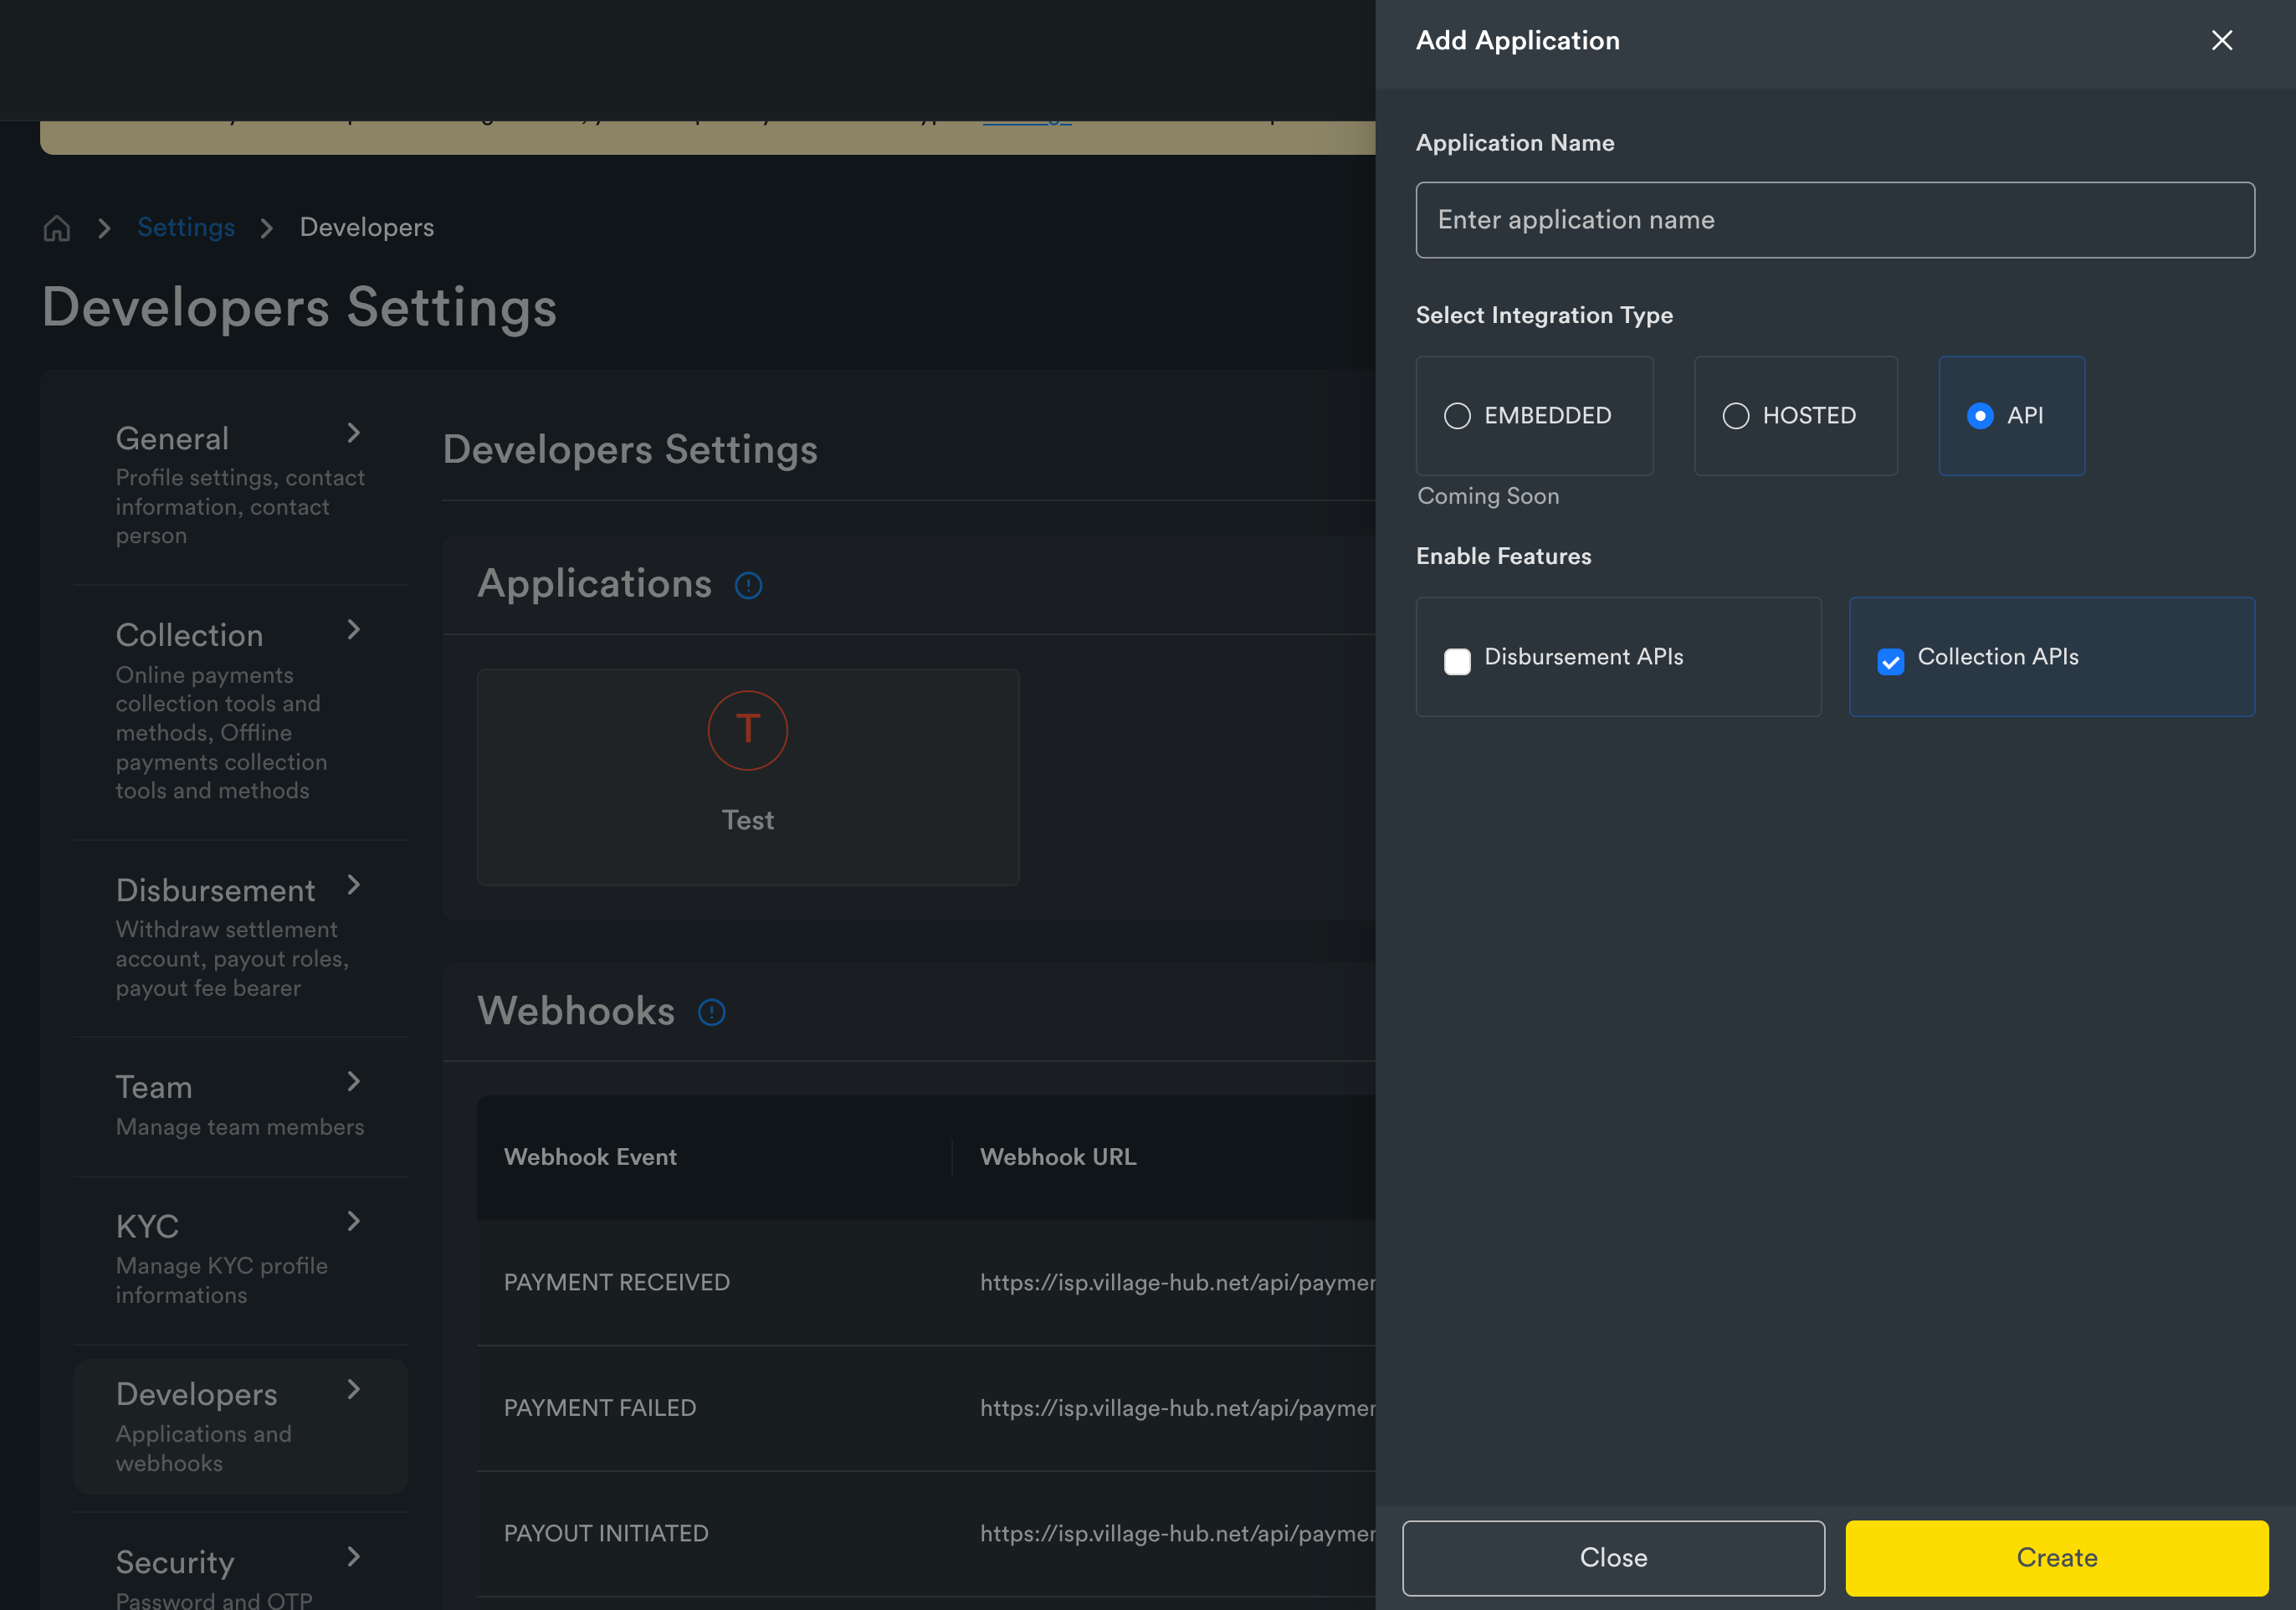
Configure the Application
Select API as the application type, then fill in the application details. Leave the Callback URL blank for now.
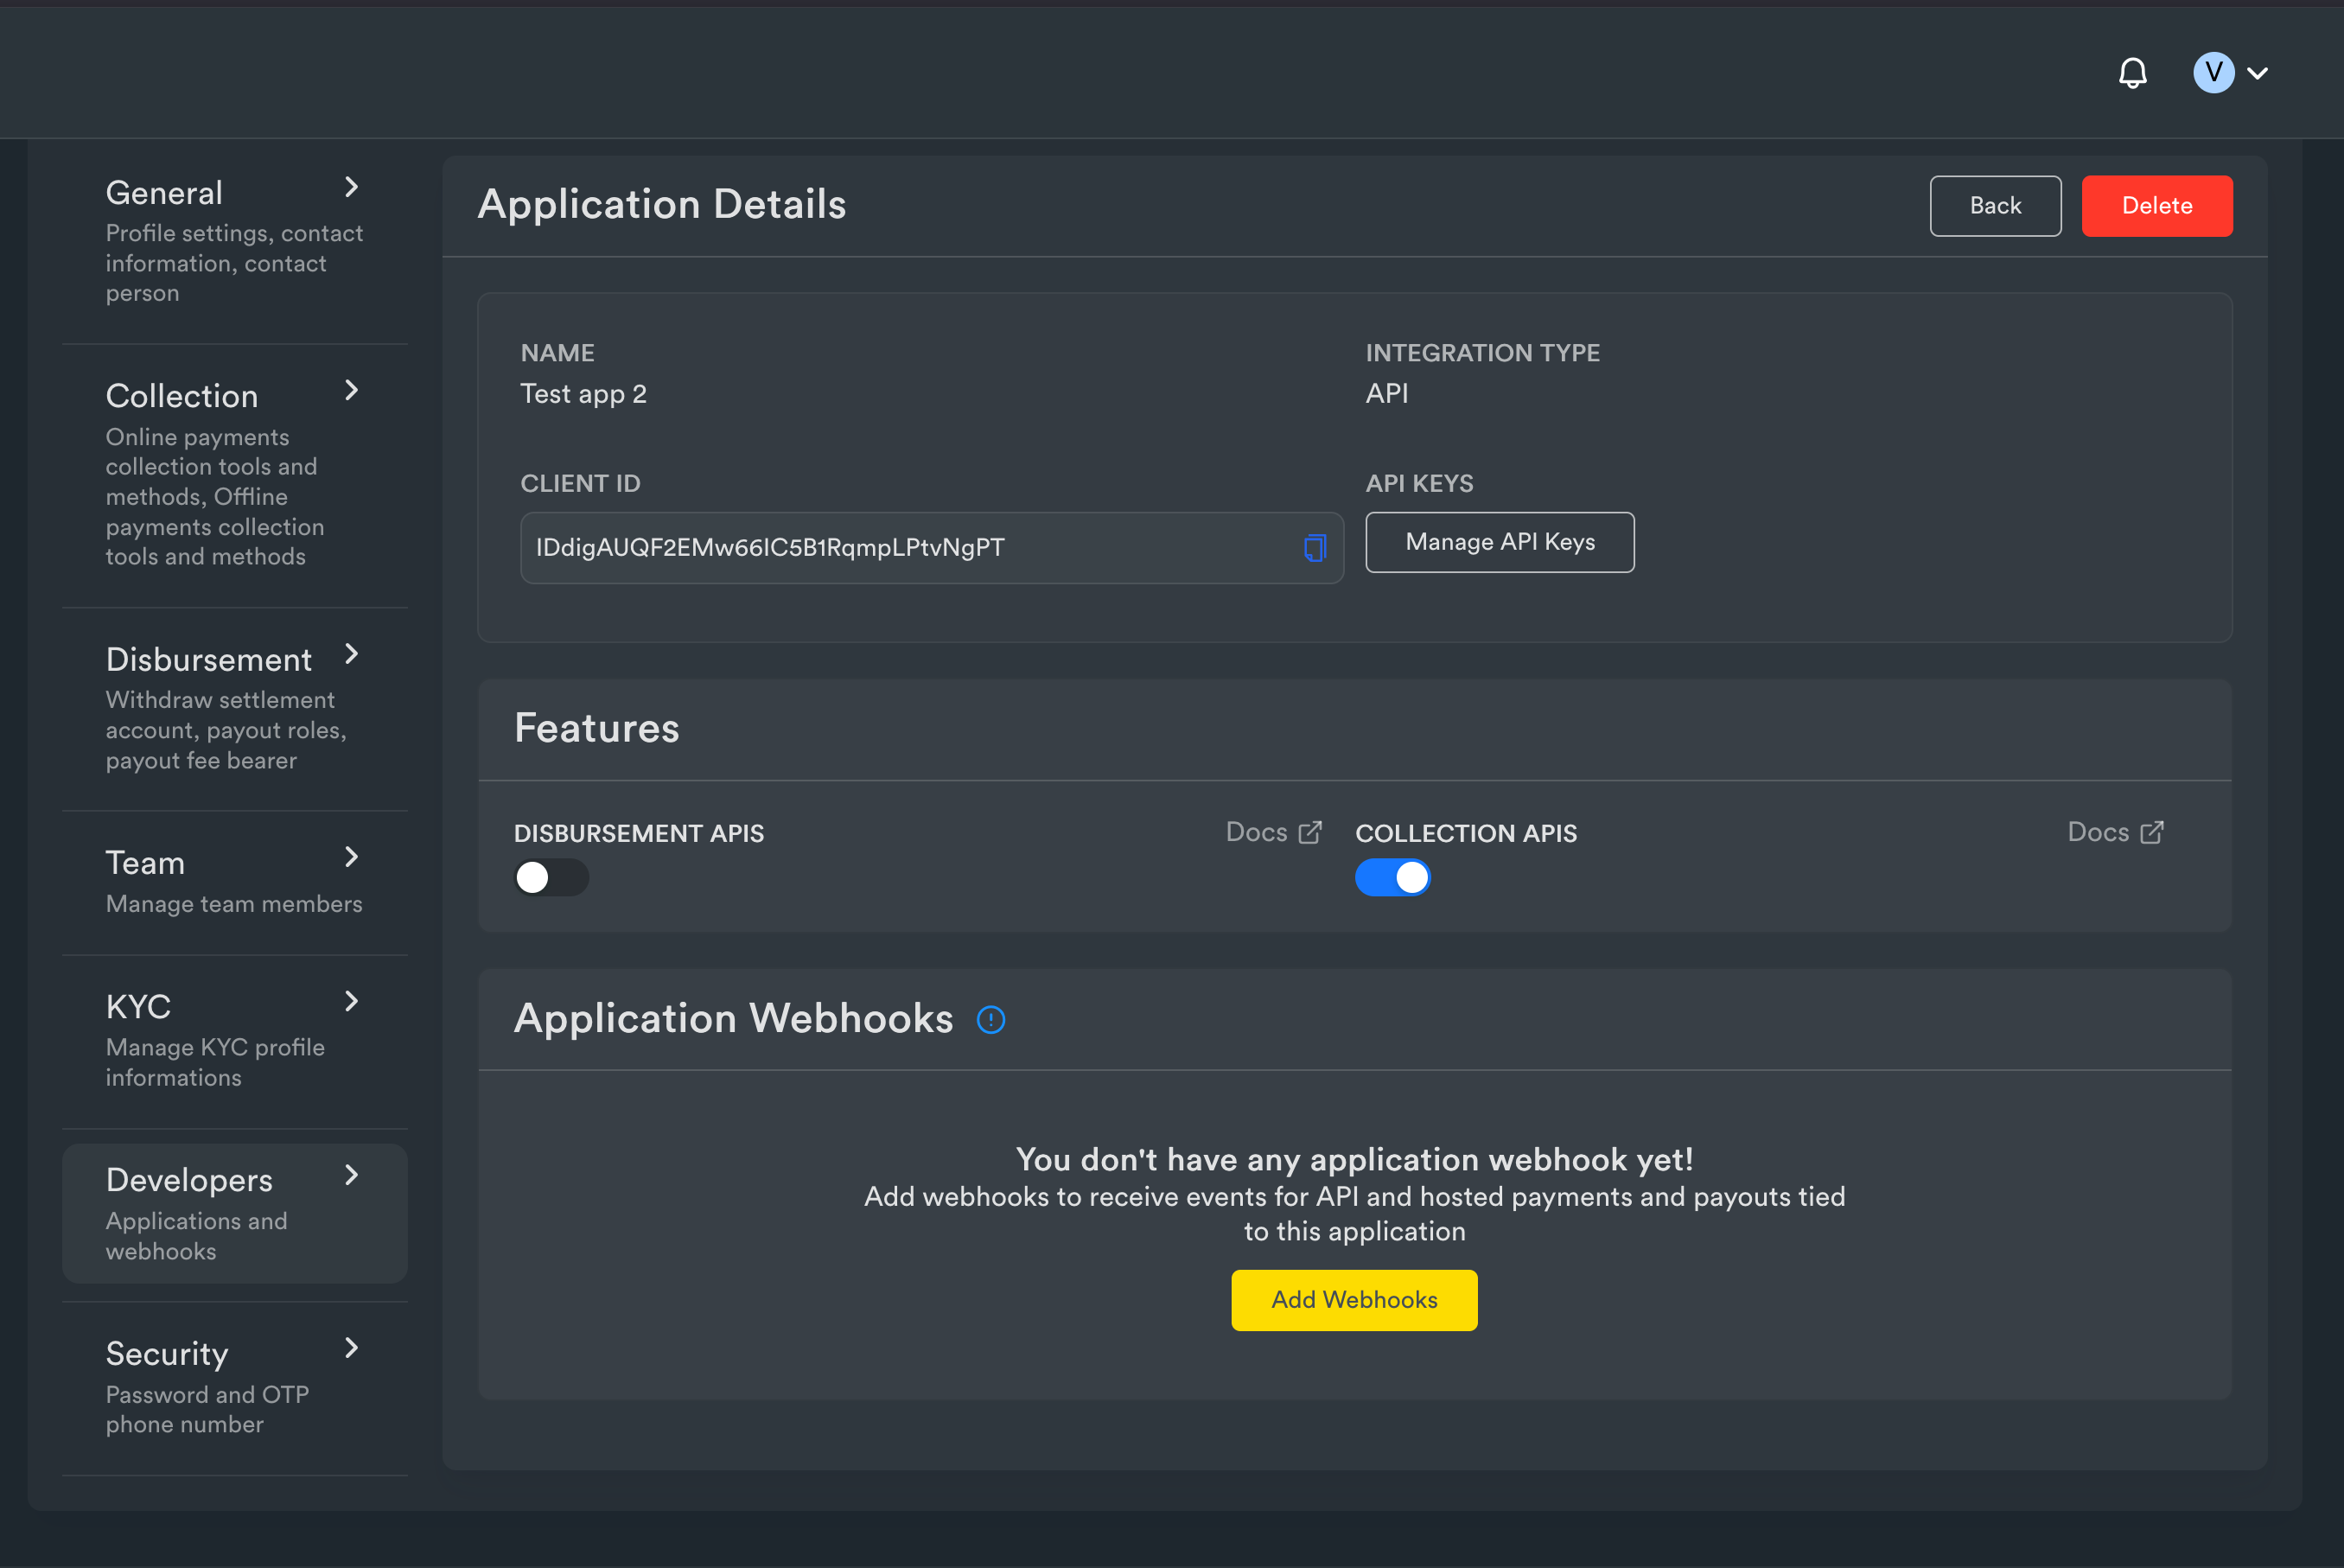
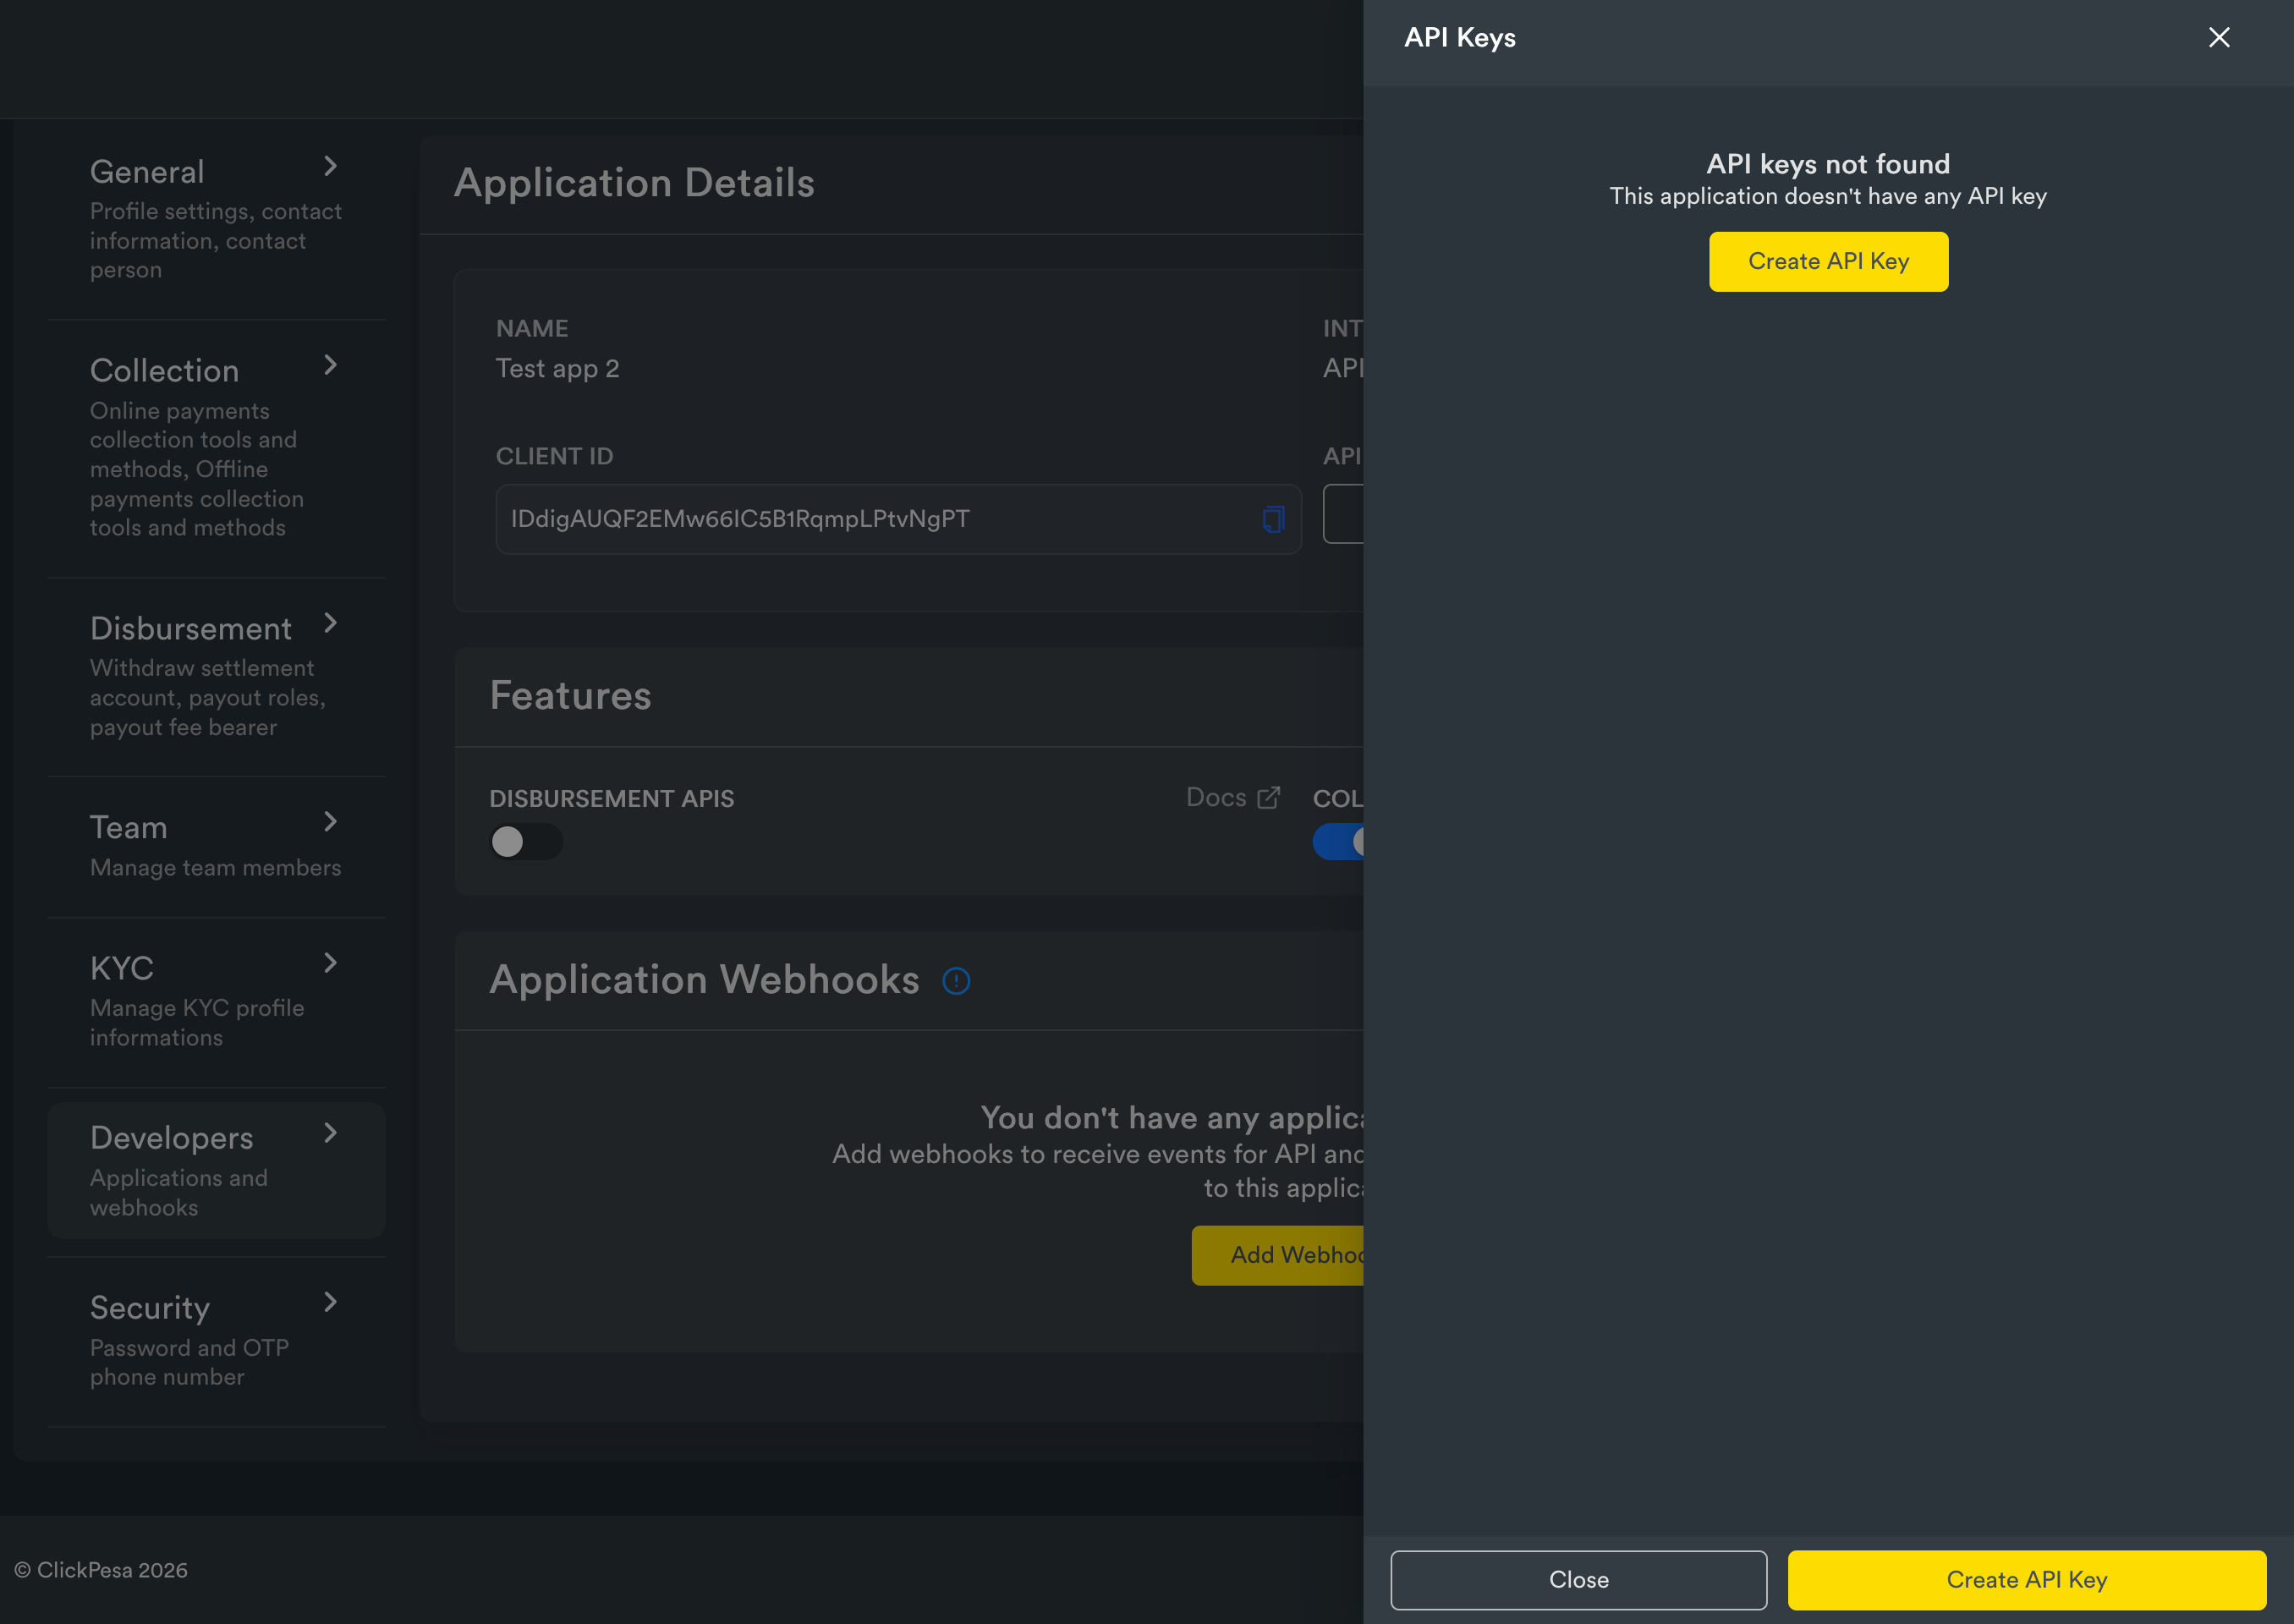
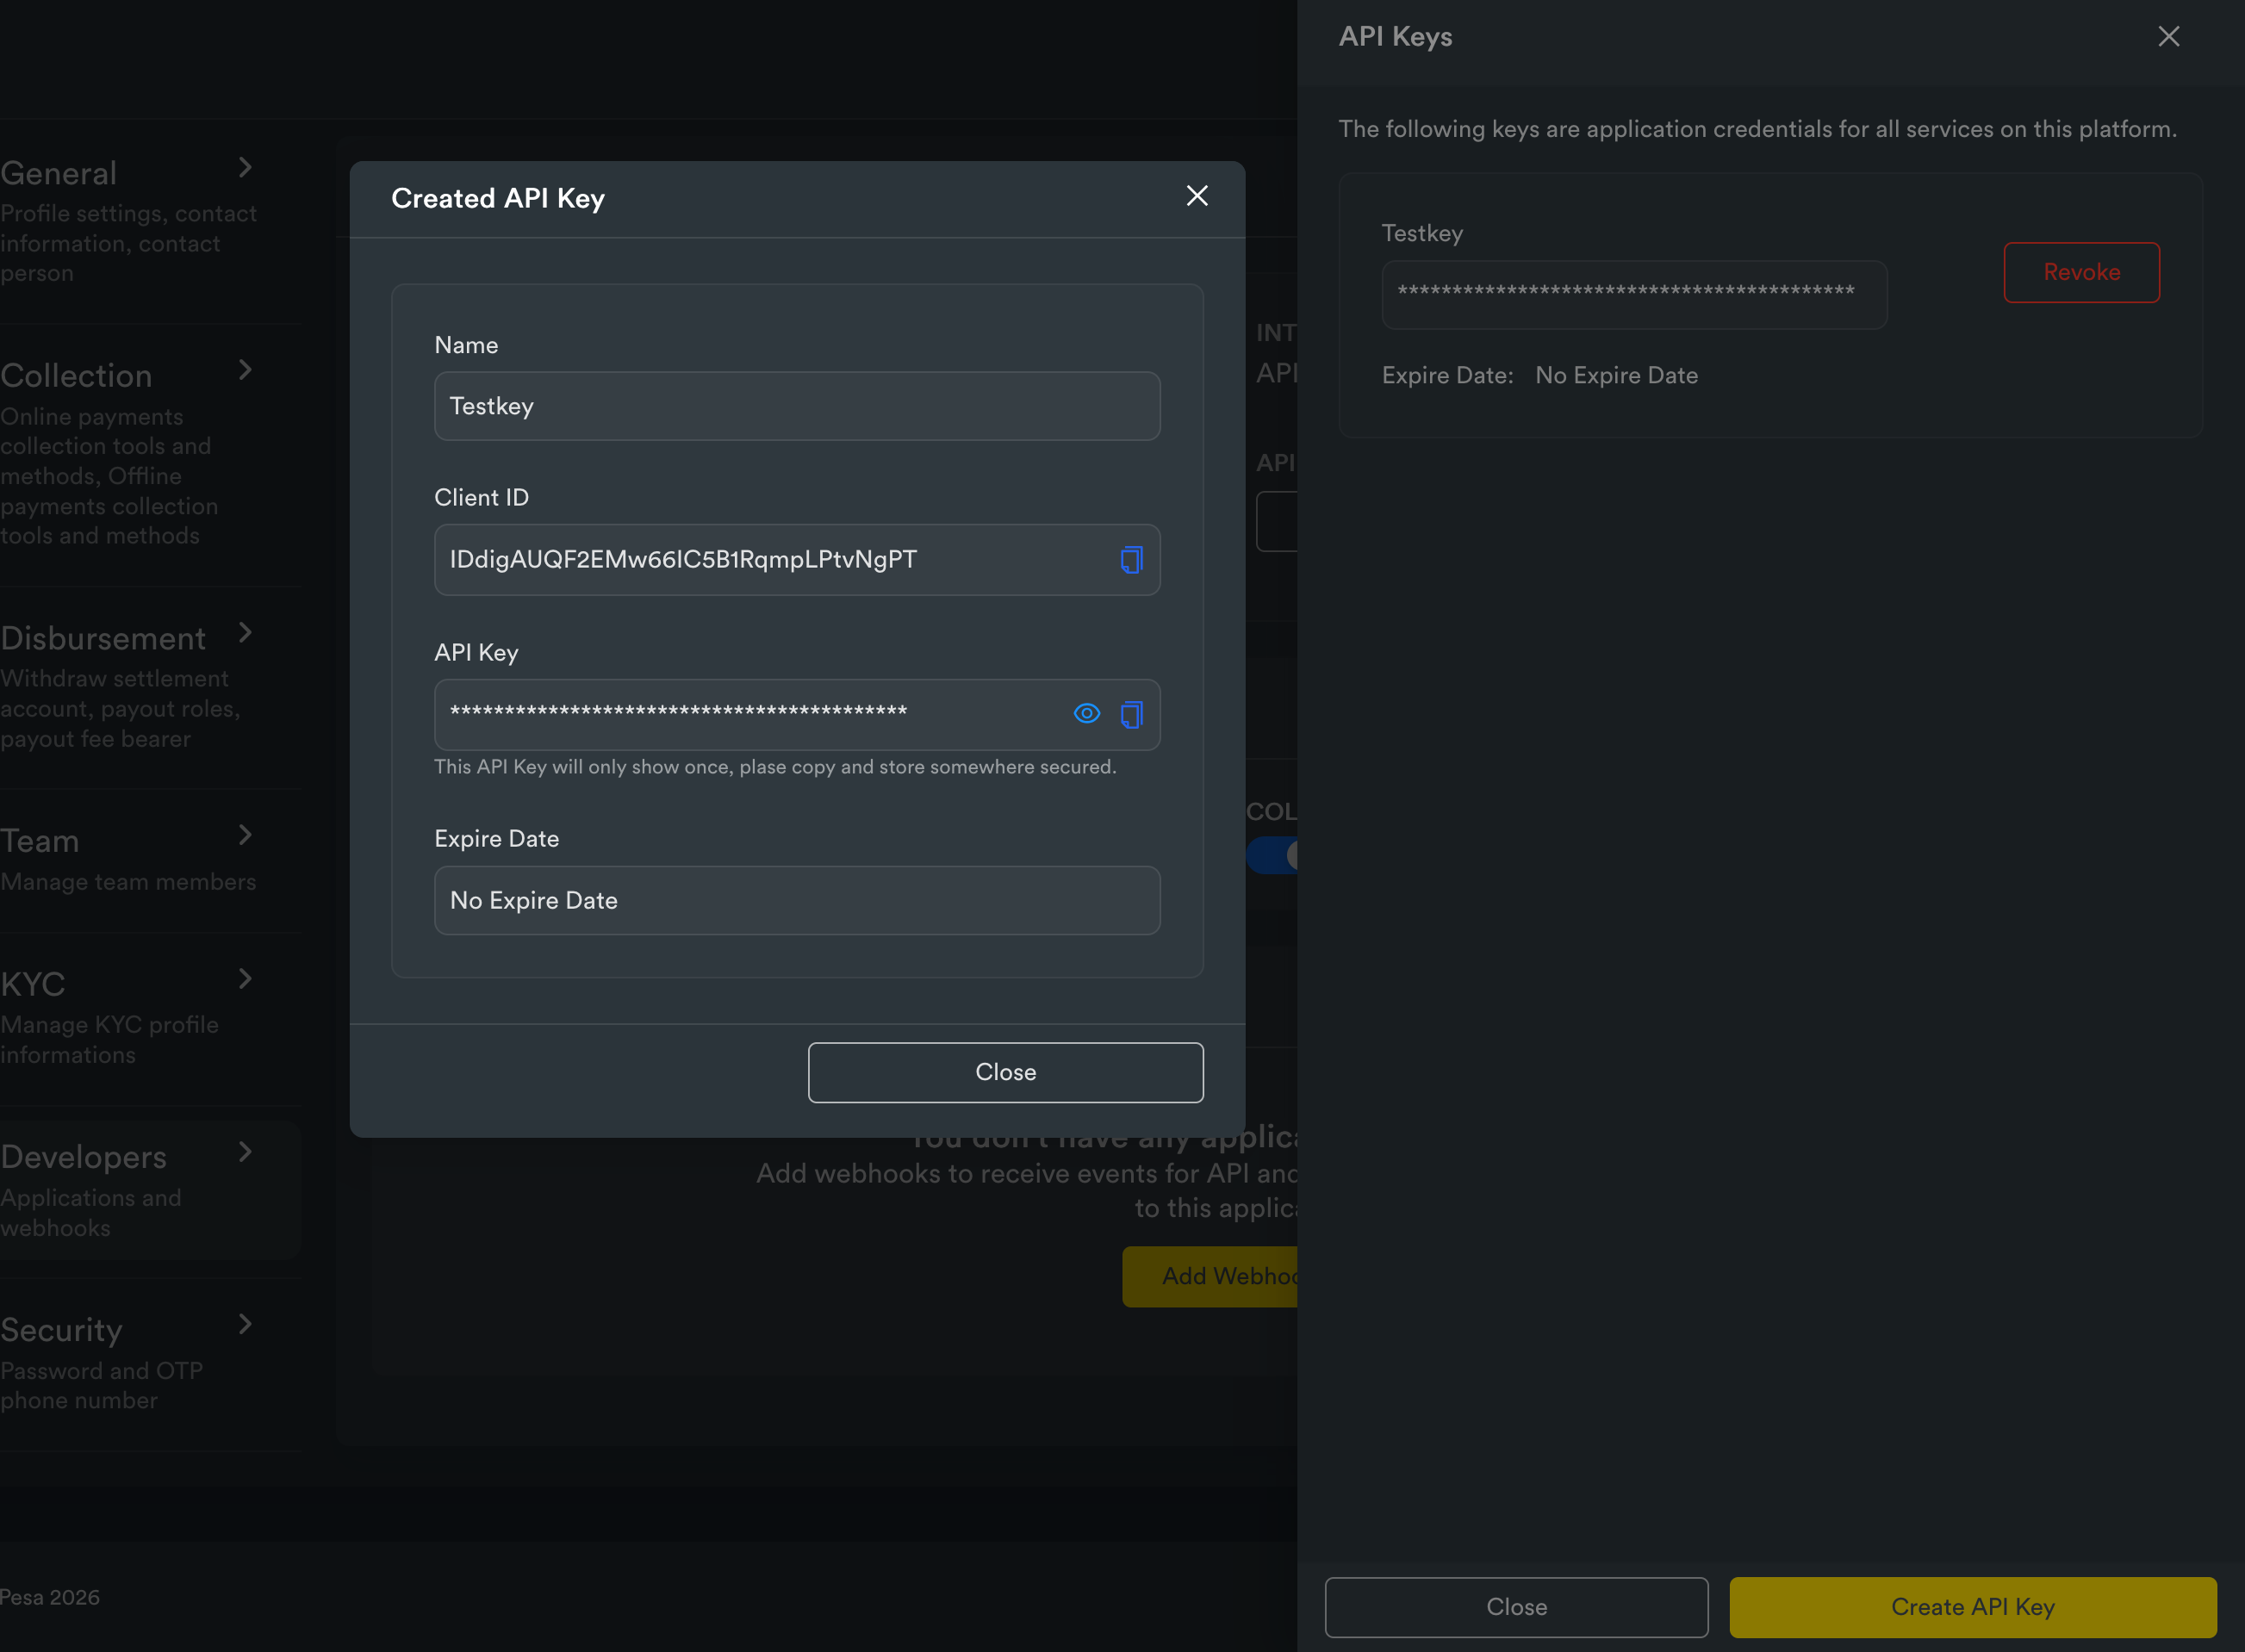
ClickPesa will then display your Client ID and API Key. Copy both.
Paste Credentials into VillageHub
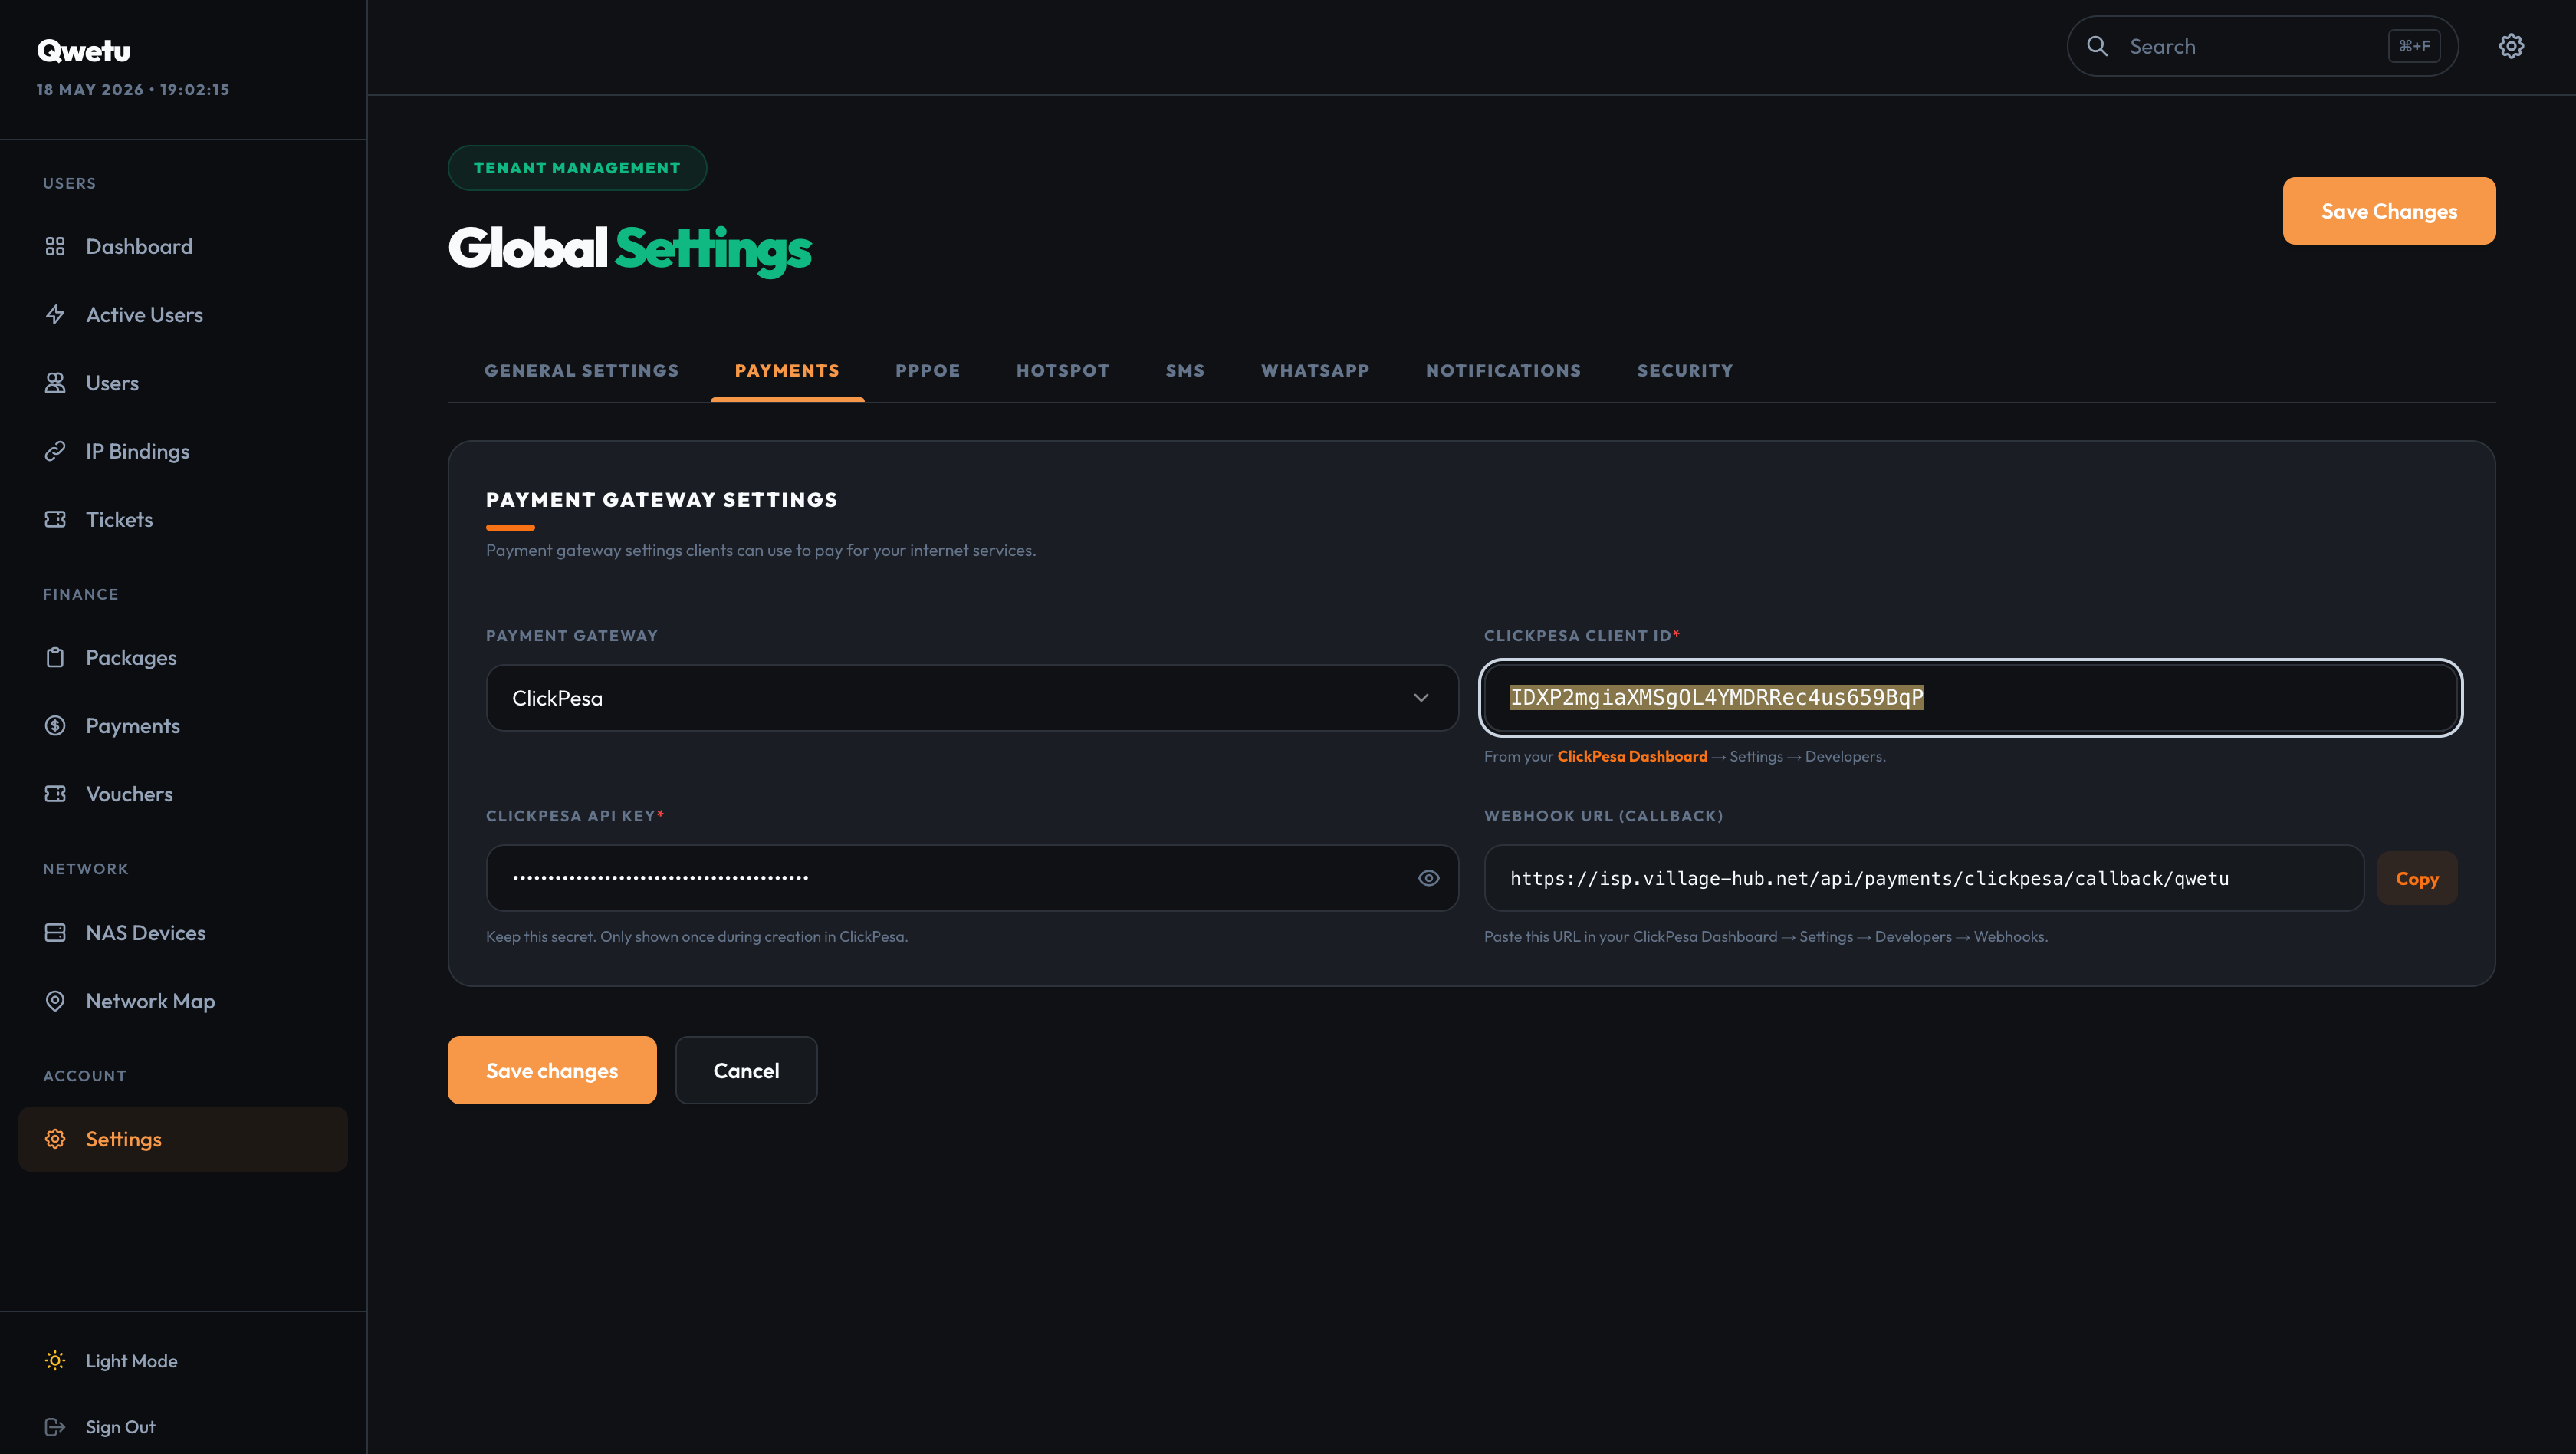
Admin Panel → Settings → Payment Integration. Paste your Client ID and API Key.
Set Your Webhook Callback URL
VillageHub generates a unique callback URL. Copy it and paste into ClickPesa's Callback URL field.
https://isp.village-hub.net/api/payments/clickpesa/callback/{tenant-id}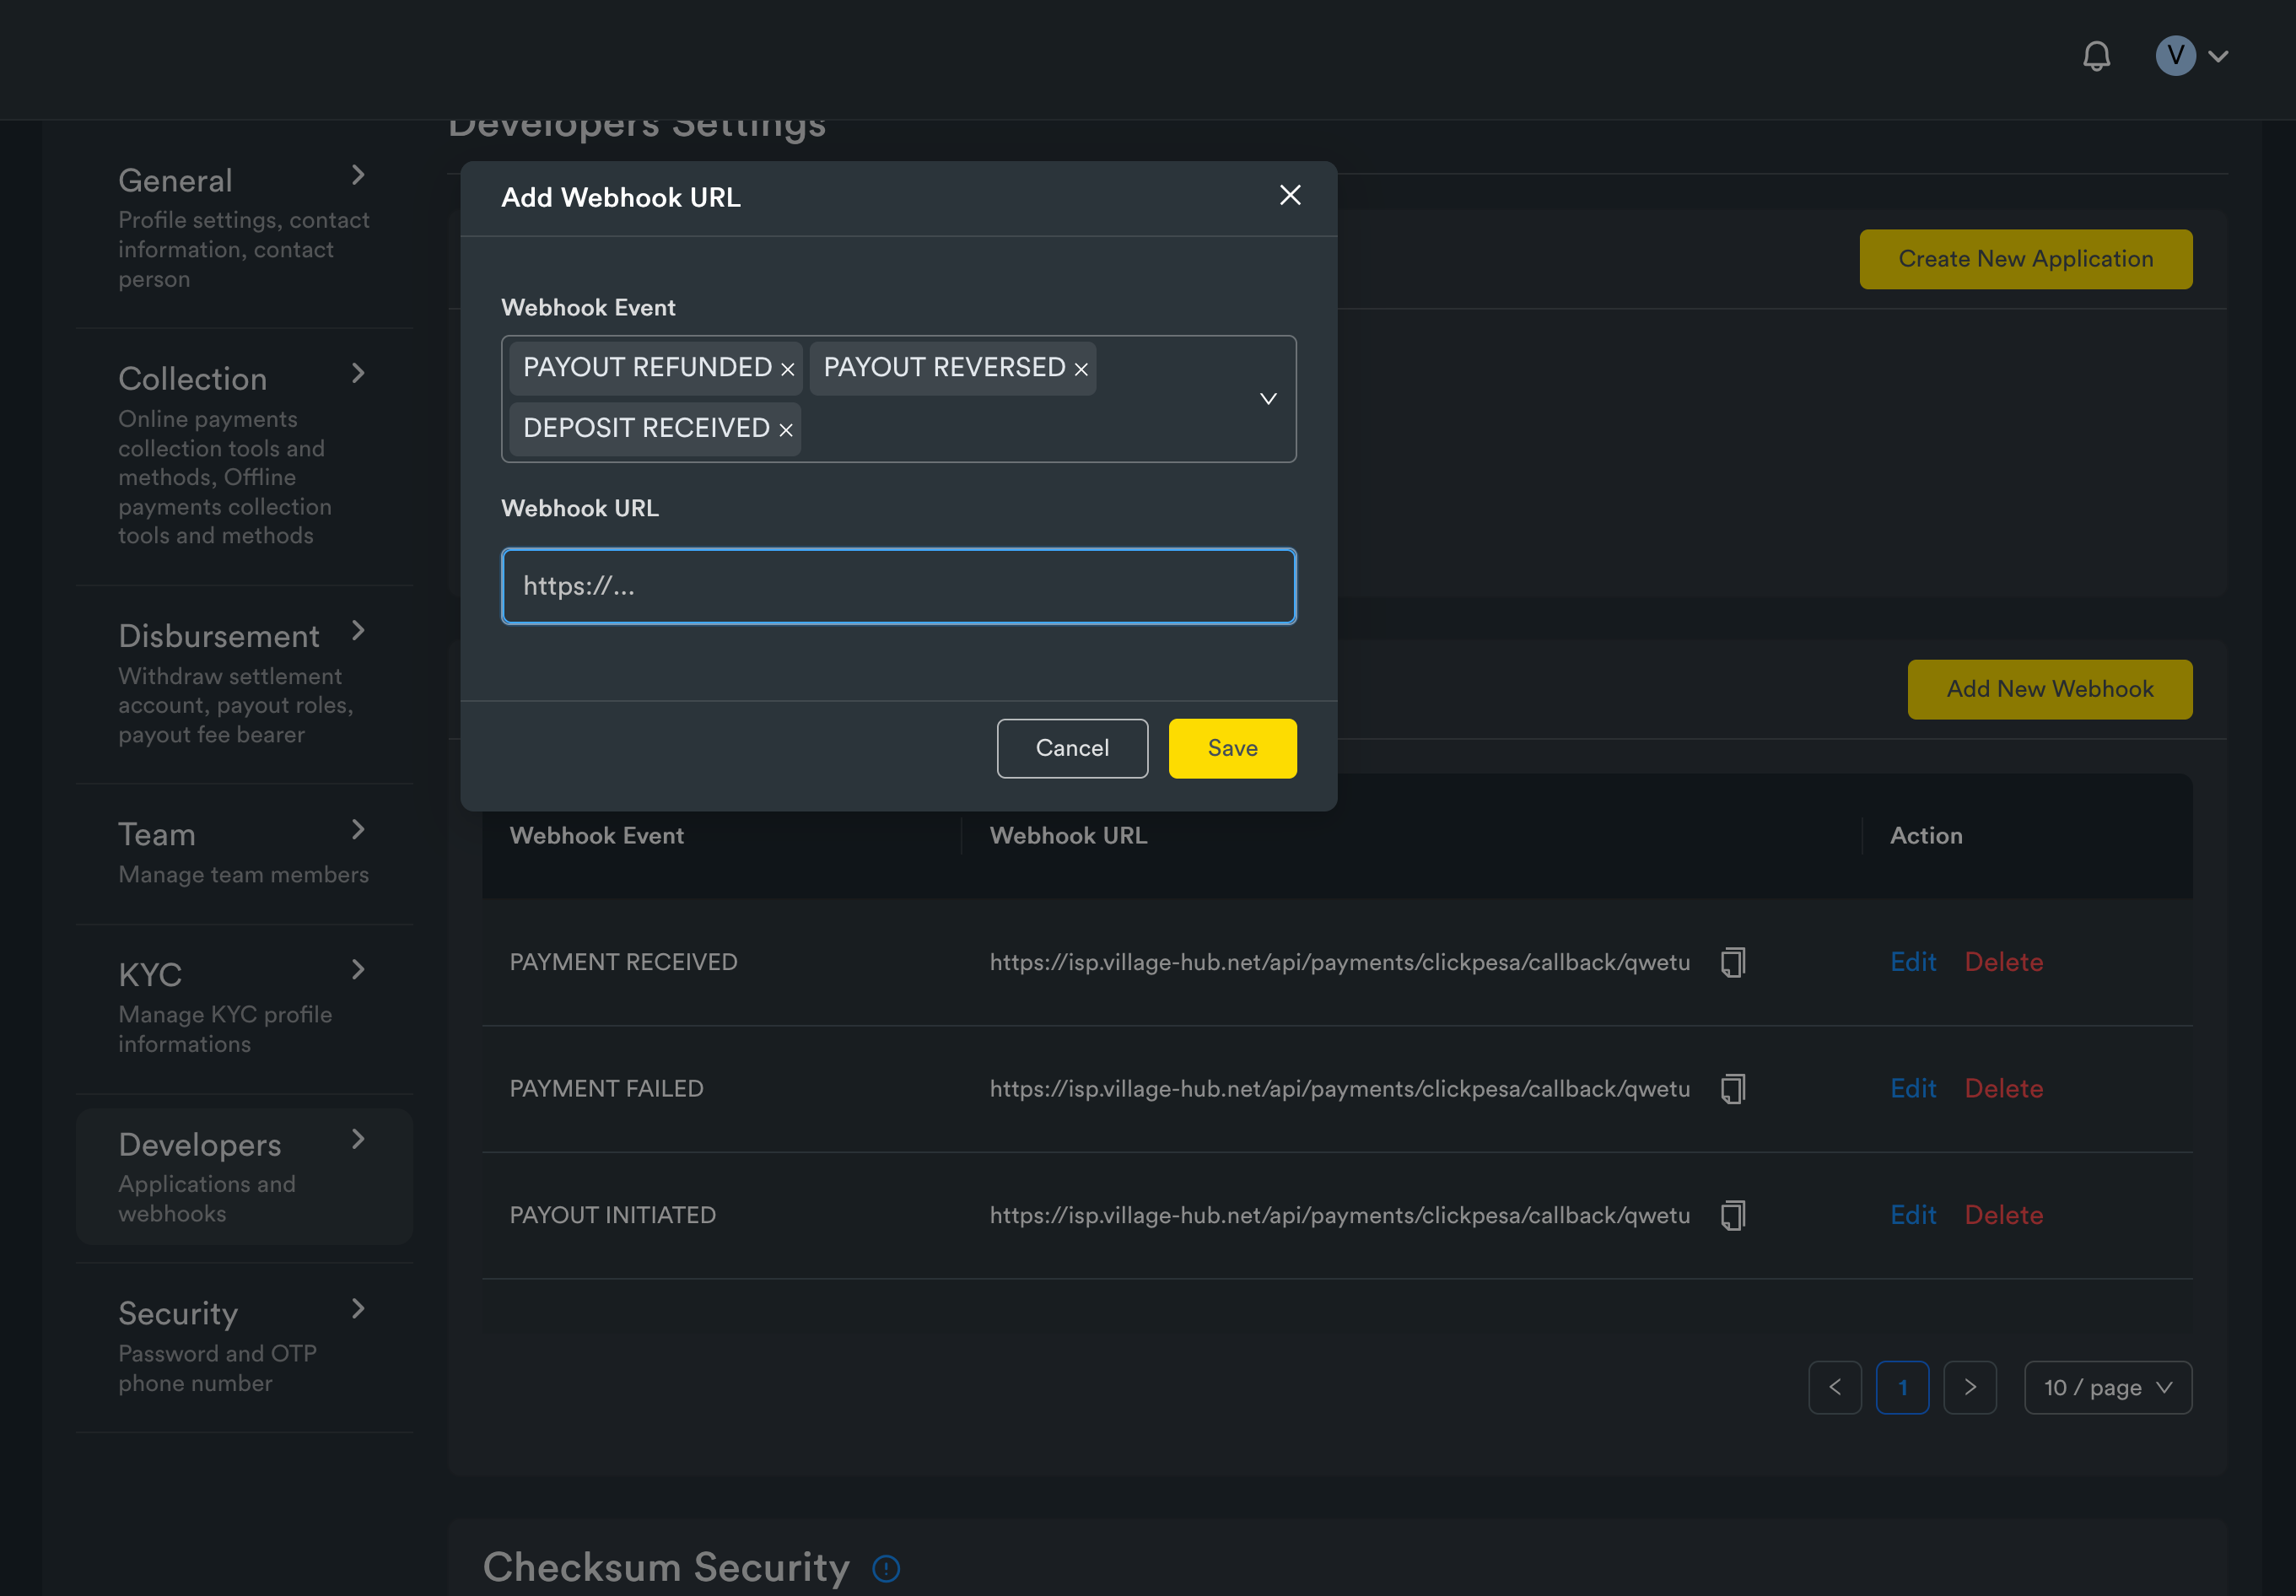
Test Your ClickPesa Integration
Before rolling out to customers, always run a test transaction to ensure your setup is functioning correctly:
- Create a test package in VillageHub with a very low cost (e.g., 100 TZS).
- Connect to your portal, select the test package, and complete the ClickPesa checkout.
- Confirm the following:
- The payment is processed successfully on your phone via ClickPesa.
- The transaction shows as paid in the VillageHub payments tab.
- Your test device's package activates automatically, and internet access is granted (Hotspot or PPPoE).
You're connected!
Subscribers can now seamlessly pay via Airtel Money, Tigo Pesa, HaloPesa, and M-Pesa. Payments reflect automatically within seconds.